ADB (Android Debug Bridge) is a command-line tool that lets you control an Android device from your computer. It lets developers and users install apps, debug software, access files, and control device functions—all from their computer.
GeeLark now includes ADB integration, giving users more control over their Android devices. This feature works with Android 11/12/13/14/15.
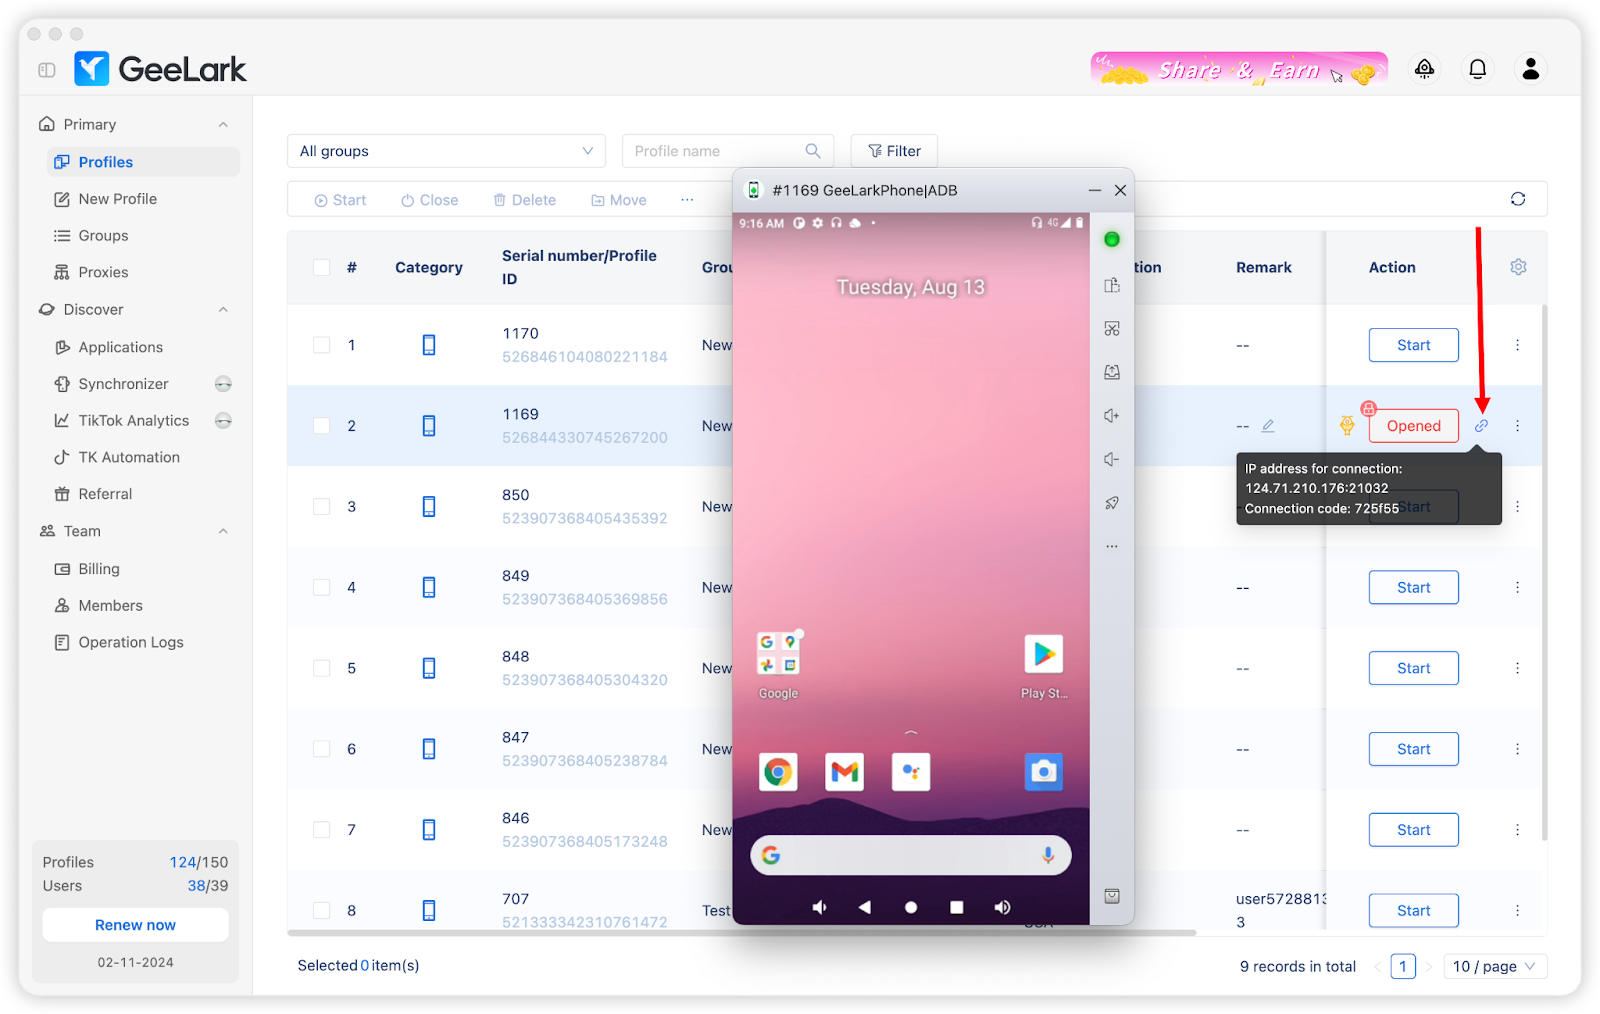
Here’s how to use ADB in GeeLark:

Enabling ADB for several cloud phone profiles is also available.


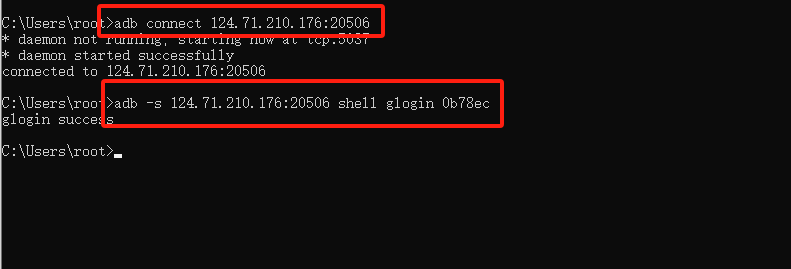
adb connect *IP address for connection*" to connect to your desired IP address.Next, enter the login command with your connection code: adb -s *IP address for connection* shell glogin f850ef
For example:
adb connect 124.71.210.176:21781
adb -s 124.71.210.176:20899 shell glogin f850ef
